
12 Fun Experiments for Kids:
Easy Science Projects to Do
at Home or in School
Experiments for kids are tons of fun, and you will find that most kids will spend hours going crazy about some easy science projects for kids that shocked them with their amazing reaction.
The fun science projects on this page can easily be done at home, e.g. in the kitchen or bathroom or outside. Also they can serve as inspiration to fun science fair projects for school.
If you find you need more inspiration than you can find on this
page, there are also great
online resources that focus on children and science.
The truth is that there are hundreds of home science experiments,
fun science experiments,
science projects for kids, crazy kid science
experiments, kids science games, science activities for
kids, cool science experiments, easy science experiments, fun
science experiments, and science games for kids that you can play -
all you have to do is great creative.
On this site you will
find many fun science experiments for kids, including:
- Gravity experiments
- Water experiments
- Magnetism experiments
- Earth science experiments
- A balloon experiment
- Chemistry experiments
- Experiments involving light bulbs
- Energy experiments
- Egg experiments
- Plant experiments
- Optical science experiments
- And all kinds of 4th grade science experiment and 5th grade science experiments for your kids
Have fun looking through the list of experiments for kids below, and
maybe you'll find an experiment or two that you will enjoy doing
just as much as your child!
The List of 12 Fun Science Experiments for Kids
1) Chocolate Fun - A Temperature Experiment
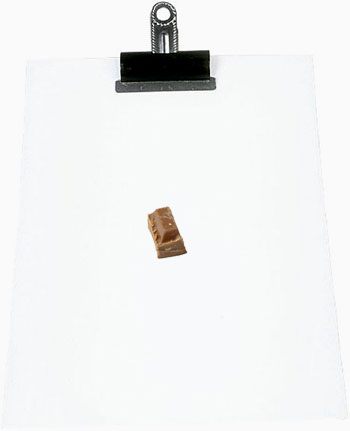 There are few things tastier than chocolate, but who knew that it
could be an important part of your kids' science?
One of the
best easy science projects for kids is one that determines how
chocolate melts, which helps your kids to learn how the temperature
is different under different conditions.
The first
part of this one of easy science projects for kids:
Step 1: To begin, break a large bar of chocolate
into a few pieces, and place one of the pieces on a sheet of paper.
Step 2: Take that piece out into your yard,
and put it under a tree in the shade.
Step 3:
See if the chocolate melts, and write down how long it took if it
did. If not, see how soft it was after sitting there for 10 minutes.
The second part of this one of easy science projects for
kids:
Step 4: Take another piece of
chocolate and place it directly in the sunlight, and see how long it
takes for the chocolate to melt.
The third part of
this one of easy science projects for kids:
Step 5: Place one piece of chocolate on paper, and another
on a ceramic plate to see if the surface also helps to heat up the
chocolate faster. Record your findings.
The fourth
part of this one of easy science projects for kids:
Step 6: Take a last piece of chocolate and place it
on a plate in front of the window inside your air conditioned home.
See if the chocolate takes as long to melt inside as it did outside,
or if it takes longer due to the cooler temperature inside your
house.
You can get creative with this test, trying to melt
chocolate inside a bag, wrapped in tin foil above a space heater, in
your mouth, or any other places you can think of.
Write down
your observations and see what makes the chocolate melt faster and
what prevents it from melting.
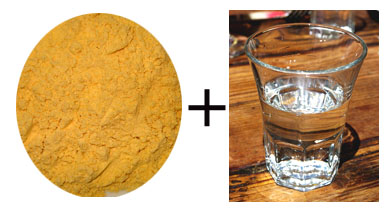
2) Quicksand - A Fun Friction Test
 Quicksand is a terror of the jungles, and no doubt your kids have
seen old Tarzan movies where the villain falls into the quicksand
and drowns.
There is quicksand in many parts of the world,
and the truth is that it can be a fascinating subject that will
thrill your kids.
You can even make your own quicksand using
a few simple ingredients found at home.
Step 1:
To begin, mix a cup of corn flour with half a cup of water. The
combination of these two ingredients will make a quicksand, and you
can stir it to prove that it really does move. However, if you mix
it up very quickly, you will find that it will get very hard, while
stirring it slowly will keep it at the same consistency - an odd
result.
You can take the opportunity to explain to your
children that the grains in your quicksand will rub together, which
causes friction.
If you stir them too quickly, they cannot
move over and around each other, so they will harden and can
actually have holes poked into them.
It will be a
fascinating experiment that will delight your kids.
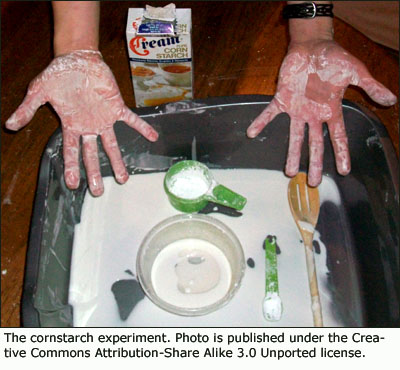
3) Solid AND Liquid ... at the Same Time
 Most people know that materials go from liquid to solid or from
solid to liquid, but imagine a material that was both solid and
liquid.
This is one of the most fascinating types of
experiments, and your kids will be amazed when they see how
it works.
Step 1: What you will need to do
is mix about two tablespoons of cornstarch with one tablespoon of
water.
Step 2: Mix it until the cornstarch
is still fairly thick, though it has been blended into the water.
Use a plastic cup to mix the cornstarch, and pour it out onto your
hand.
The mixture should pool nicely in your hand, and you
may even feel like it will try to seep through the cracks in your
fingers like any good liquid should.
However, if you quickly
move the cornstarch around and pass it from hand to hand, it will
form a solid that will maintain its shape. The minute you stop
moving it around it will revert to a liquid, but while it is in
motion it will remain a solid.
This experiment for
kids works similar to the quicksand experiment, as the motion of the
cornstarch in the mixture is limited thanks to the fact that the
grains are moving quickly.
You will find that your child's
eyes will widen as he sees the cornstarch ball transform back and
forth from liquid to solid, and it is a mind blowing experiment.
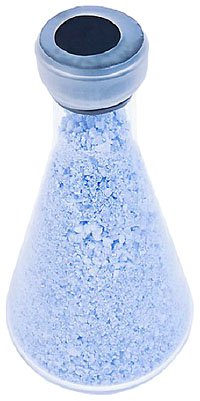
4) Bath Salts - A Fragrance Experiment
 Bath salts are popular for those that like to enjoy a relaxing bath,
but most kids don't know what they are much less understand how they
are made.
This example of experiments for kids can help you
to teach your kids about bath salts, how they can make them, and how
they can be used to add fragrance to your bath.
It can even
be a nice gift to give to someone else, and it won't be too costly
either.
Step 1: You will need a cupful of
washing soda, a small amount of essential oils used for fragrances,
and a plastic bag.
Step 2: Place the
washing soda into the bag, and use a glass bottle or a rolling pin
to smooth out the lumps and crush them as much as possible. It will
take a bit of effort to get it right, but it can be good practice
for baking time with your kids.
Step 3: Once
the lumps have been crushed, empty the bag into a plastic container.
Step 4: Use a spoon to mix some food
coloring into the mixture, stirring well and adding as many colors
as you want until you get just the right shade.
Step
5: Drop in a bit of the essential oils, and stir well to
ensure that the oil is nicely absorbed by the soda.
Step 6: After that, just put the soda into a number of
different containers - making sure that the containers are properly
dry before putting in the soda.
When the soda comes in
contact with the water, it will form a nice lather and the chemical
reaction of the salt in the water will release the pleasant scent to
make your bath much nicer and more relaxing!
5) Bacteria Farming
Most people see mold on bread or fruit as being harmful, but the
truth is that this bacteria has many uses.
You can use this
one of experiments for kids to explain how cheese is made, how
yoghurt is made, how bread is made, and how many foods are made -
all using bacteria.
It is such a central part of our lives,
and you will find that few of the things you eat don't contain
bacteria of some sort.
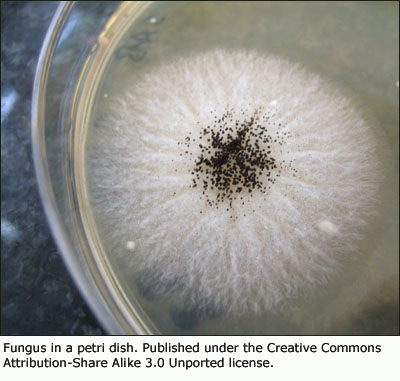 Step 1: To do this
experiment, you will need a petri dish that contains agar, a number
of Q-tipped cotton swabs, and some pieces of newspaper.
Step 2: What you will do is use the swabs to
collect samples of dust or germs from around the house, and you will
apply that sample to the petri dish. Make sure to put the lids back
on tight, as that ensures that no oxygen gets in - oxygen can kill
bacteria.
Step 3: Place the dishes that you
are using in a warmer area of the house, as the warm temperature
will promote the growth of the bacteria.
Step 4:
Check the dishes daily to see how your bacteria are growing, and you
will be surprised by how fast they multiply in such a pleasant
condition. You can get bacteria from just about any place, and you
will find that it will grow easily in these favorable conditions.
Just make sure to wrap the bacteria-filled dishes in newspaper
when throwing them out, as you don't want to allow the bacteria to
run loose in your garbage can and cause all your food to rot quickly!
6) How Big are Your Lungs?
 Your lungs are responsible for your oxygen intake, but they also
ensure that your body gets rid of carbon dioxide.
Everyone
has a different lung capacity - meaning the amount of oxygen that
they can hold - and you can use this simple experiment to measure
just how much your lungs and your kids' lungs can hold!
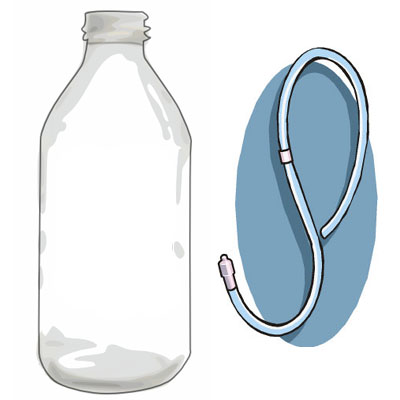
Step 1: With this one of experiments for kids, you
are going to need a plastic tube - a thin gardening hose should be
fine - and a plastic bottle.
Step 2: Fill
your bottle with water all the way to the top, and fill your sink
with water as well.
Step 3: Carefully place
your hand over the mouth of the bottle as you turn it upside down,
and place it in the sink below the water level. No water should
escape and the bottle should stay full.
Step 4:
Without removing the bottle from the water, insert the tube into the
bottle. Suck in as much oxygen as you can, and blow into the tube
with all of your strength.
Your breath will push the water
out of the bottle, replacing it with air. You can measure the amount
of air that was pushed into the bottle, and that will tell you what
your lung capacity is.
See who can get the most air into the
bottle, and that will tell you who has the strongest and biggest
lungs.
7) Homemade Lava Lamp - A Fun Bubble Experiment
 Isn't it nice to look at a lava lamp at night, watching how the
different parts of the lamp move and swirl soothingly?
You
can make your own lava lamp with your kids at home, and you may be
surprised to find that it is actually quite an easy thing to do.
It is a simple chemical reaction that will get the job done, and
it is a fascinating experiment.
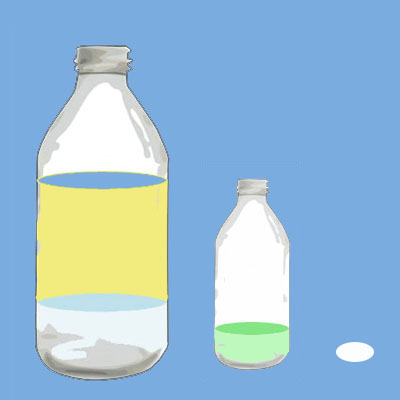
Step 1: Fill
a clear plastic bottle to roughly ¼ of the way with water, and fill
the rest of the bottle with oil - any cooking oil should do. You
will notice that the water stays bunched up in large globs, as it
does not mix with the oil.
Step 2: Add a
bit of food coloring to your water, and you will be amazed at how
each drop works its way through the oil to blend with the water -
the end result being colored water.
Step 3:
Get an Alka-Seltzer tablet, cut it into a few small pieces, and drop
a piece into the bottle as you close the lid.
You will find
that the lava lamp will begin to move around, as the Alka-Seltzer is
causing a chemical reaction that releases gas - carbon dioxide gas
specifically.
The water is moved by the Alka-Seltzer, which
makes it rise to the top along with the gas bubbles. You can add
another piece when the reaction stops, and it will keep going as
long as you want it to!
8) Your Better Half - A Fun Brain Experiment
 Everyone has a brain that is divided into two halves, and each half
of the brain controls a different part of your body.
Which
side is your dominant side, the side that is more in control of your
body?
You can test this by doing a simple experiment that
tests out your different body parts, and the result will help you
discover which side if your dominant side.
First part
of this one of easy science experiments for kids:
You will need to make two columns on a piece of paper, with one
marked "right" and the other marked "left".
After that, it's
time to get to testing:
- Which foot do you use for kicking?
- Which hand do you write with?
- Which hand grabs items?
- Which hand throws things?
- Which foot do you jump from?
- Which way do you stand on a surfboard?
- Which eye winks more comfortably?
- Which eye looks into a telescope or tube?
Write down which side it was, and go on to another experiment.
Second part of this one of easy science experiments for
kids:
Step 1: Make a hole with your
hands about the size of a quarter, and hold it out to the length of
your arm.
Step 2: Look through the hole and
see what is visible on the other side.
Step 3:
Close your left eye to look through with your right, and then close
your right eye to look through with your left. The view through the
hole should change with just one eye, and it is the other eye that
is linked to the dominant side of your brain.
Remember that
the right side of your body is controlled by the left side of your
brain, and the left side of your body is controlled by the right
side of your brain. You will find that the side that does more
things is dominant.
9) Bubbly Eggs - Exciting Egg Experiments
 Did you know that you can cause eggs to form
bubbles around the shell of an
egg, just by using hot water?
This example of experiments
for kids will intrigue your kids, and you will find that it will be
one of the best and simplest experiments that you can try.
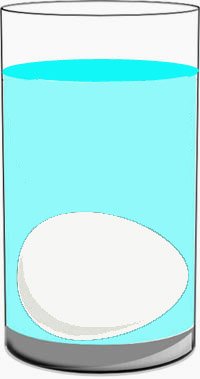
Step 1: To begin, place a raw egg inside a glass
jar or beaker.
Step 2: Heat water on the
stove until it is hot - not boiling, just simmering.
Step 3: Carefully pour some of the water into the glass jar.
Make sure to pour enough that the egg is completely submerged, or
you can fill up the beaker - whatever you prefer.
Let it sit
for a few minutes, and come back and examine it later.
When
you take a look at the egg, you will notice that there are tiny
bubbles forming around the shell of the egg. Some of the bubbles
will be so small that you will need a magnifying glass to see them,
and you can watch through the glass as the bubbles form, cling to
the surface of the egg for a short time, and then slowly bubble up
to the surface of the water.
What happens is that the egg's
shell isn't actually 100% waterproof, and the air trapped inside the
egg can get out by escaping through the tiny pores in the eggshell.
The air inside gets heated as the hot water heats up the
shell of the egg, and the air expands until its air pocket is too
small to contain it.
The only thing it can do is leave the
shell, which exposes it to the water. Seeing as air is lighter than
water, it will rise to the surface of the water.
10) Traveling Water - Fun Water Experiments about Absorbtion
This is a fascinating experiment that can teach your kids about how
water is absorbed, as well as how this absorption can actually cause
the water to travel.
It will take a bit of time for the
experiment to work, but it is a fascinating one!
Step
1: What you will need to do is fill a glass about
one-quarter full with water.
Step 2: Place
an empty glass immediately next to it.
Step 3:
Twist a piece of paper towel into something resembling the wick of a
candle, and place one end in the empty cup.
Step 4:
Place the other end into the cup with water, ensuring that the end
is inside the water.
The water will actually appear to travel
up the paper towel, into the other glass, and slowly fill it up
until the water levels in the two cups are the same.
It will
amaze you when you realize that water is adhering to the paper towel
rather than adhering to itself, and the result is water that travels
from one cup to the other.
11) Moving Molecules - Fun Water Experiments
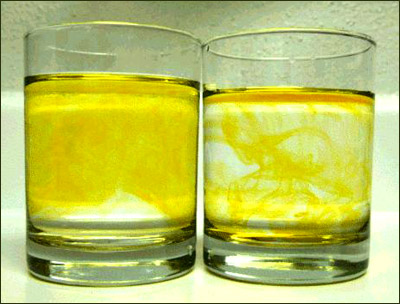 Have you ever wondered whether cold water moves faster than hot
water, or the other way around?
This one of experiments for
kids can help you to determine whether the molecules are moving
faster in slow or hot water, and this is a great project that you
can use to help your kids learn more about the molecules that make
up everything around them.
Step 1: Pour hot
water into a glass cup until it is nearly full, and pour cold water
into another glass cup.
Step 2: Use two
eyedroppers to drop a bit of food coloring into each glass, and
watch how the water mixes with the food coloring at different
speeds.
The hot water will actually move the food coloring
along faster, and this is because the molecules inside the water are
moving so quickly.
In fact, the molecules are moving so fast
that they are bouncing off each other and causing friction, and the
result of that friction is heat.
The cold water molecules
are moving very slowly, so the food coloring will move slowly too.
12) Farming - Fun Plant Experiments
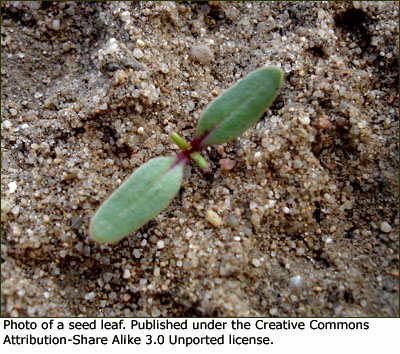 Your kids can learn all about farming and how plants grow just by
planting a few seeds of their own.
Step 1:
All you will need is a few pots, some potting soil, and some random
seeds and beans - as long as they are fresh, it doesn't matter what
you use.
Step 2: Plant the seeds inside the
soil, and place the pots somewhere the sun will shine down on them
for a few hours a day.
Step 3: Make sure to
water the plant regularly, as it needs moisture in order to grow.
Use a notebook to keep track of which plants grow more quickly, and
which take longer to grow.
These are a few fun experiments
for kids, but there are many more on the other pages. Take the time
to browse the rest of the site and find a whole lot more useful
experiments and science projects for kids!

Want to stay in touch and get the latest news?
Sign up
for my free newsletter
Parent Coaching
- For Inner Peace, Clarity and a Deeper Connection to Your Child
 Being a parent can feel like a double-edged sword. Life with kids may feel like the greatest gift you have ever received, while at the same being hugely challenging, often leaving you confused, stressed and overwhelmed.
When we feel like this, we've lost touch with ourselves. We can't hear our own inner voice, and it's difficult to know what is 'right' for us and how to act.
I offer in-depth parent coaching to help you regain your balance and get back in touch with yourself. From a place of inner peace and clarity, your will find your own answers which will help you reconnect with your child from a place of unconditional love and acceptance.
Read more about my parent coaching here.
Where Would You Like to Go Next?
Fun Science Games and Experiments for Kids
 27 Learning Games for Kids A List of the Best Educational Games for Kids. |
 15 Fun Science Projects for Kids - Fun Learning Games at Home. |
 14 Fun Science Experiments for Kids: Guidelines for Kids Science Projects and Learning Games. |
 14 Science Fair Projects for Kids: Easy Guidelines to Fun Science Fair Ideas. |
 36 Recommended Science Websites for Kids: Science Sites for Kids That Make Learning Fun. |
 Fun Facts about the Solar System for Kids and Fun Kids Astronomy Games. |
Fun Math Games for Kids
 Fun Multiplication Math Games and Educational Times Tables Activities for Kids. |
 Exciting Math for Kids 16 Fun Math Activities and Counting Games. |
 Educational Kids Math Games Cool Math Websites and Physical Fun Math Activities. |
 22 Cool Math Games for Kids Fun Math Activities with Multiplication, Addition and Subtraction. |
 15 Fun Math Games for Kids: Turning Multiplication, Addition and Fraction into Fun Math Activities. |
 Cool Math Games for Kids and Fun Math Activities for All Ages. |
Back to the top of this page about 12 Fun Experiments for Kids: Easy Science Projects for Kids to Do at Home or in School
Go to the Positive Parenting Ally Homepage


